Thursday 31 May 2012

Pantry Constructed

Well apart from the battens and trim, the back end of the galley is now complete!

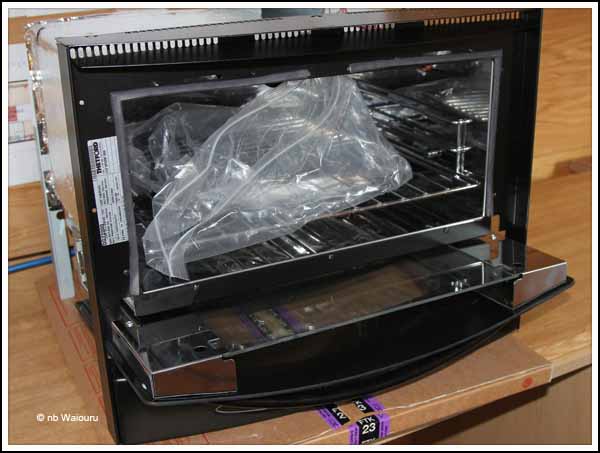
I have run the 12v electric supply to the gas oven (ignition only) and at the end of the day gave all the bare timber one coat of protective varnish.

The gas oven is a very snug fit which has enabled Richard to construct a good size cavity above. 

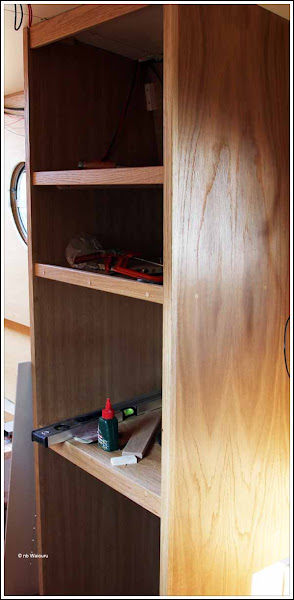
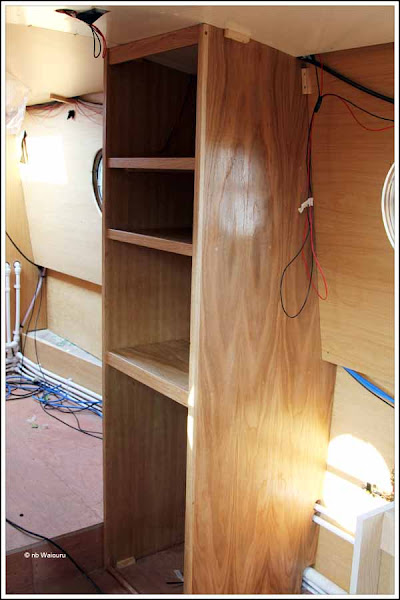
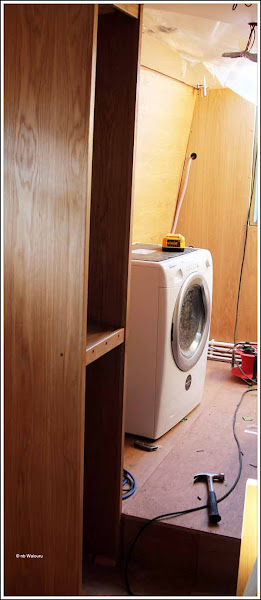
The pantry opposite will have a pull-out vertical drawer in the bottom half and adjustable shelves in the top half.  The top half will also have a cupboard door.

I spent much of the morning assembling and fitting the drawer mechanisms under the galley cupboards.  These replace the kickboards and allow Jan to use what would otherwise be a wasted void.

Richard had done his financial calculations and it was cheaper to purchase the drawers rather than him make them.  They have the same soft close mechanism as the drawers in the top of the cupboards.

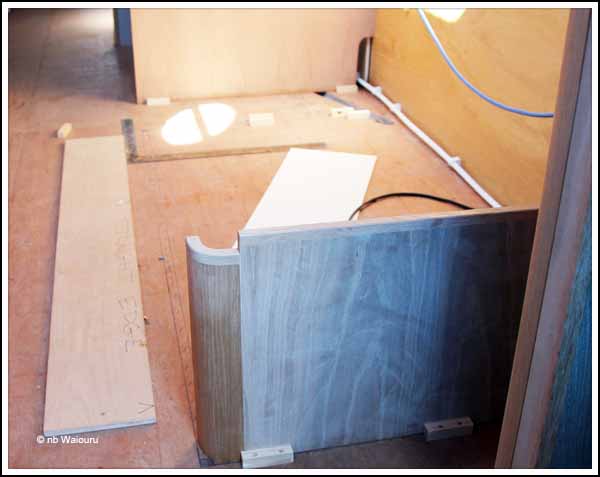
We then had a discussion about how the galley units will terminate at the saloon end of the boat.

The galley cupboards end at point A.   Richard intended to make a false end using a quarter moulding (point B) with a ¾” oak veneer panel across the end of the cupboards that would conceal the cupboard feet and kickboard drawers.  The 3” void between points A & C seemed to be a waste of space so I asked Richard of we could use this area by creating shelves in it for items such as spices, magazines and other odds & ends. 

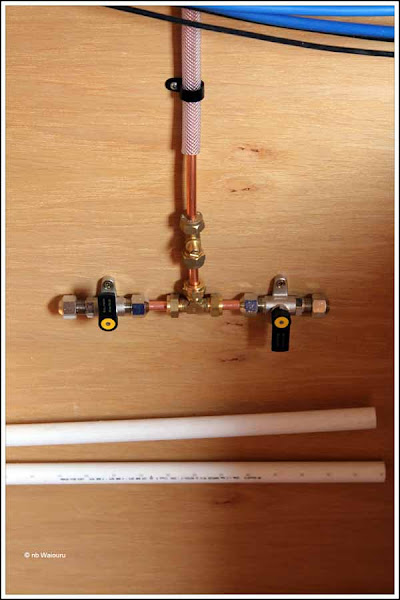
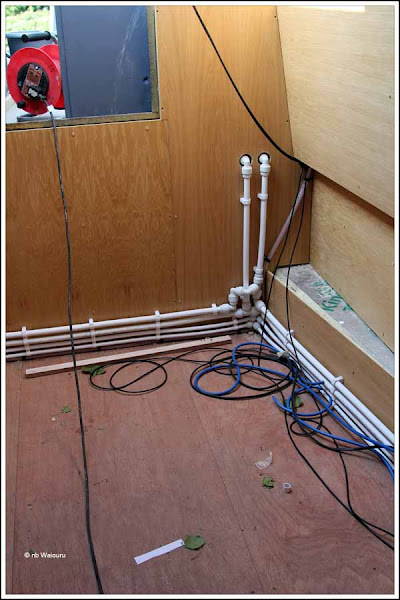
Tomorrow we will level and join all the galley cupboards before scribing and cutting their backs so the will fit against the lining but also provide room for the plumbing and heating pipes.  The galley will then be ready for the granite bench top supplier to measure and create their templates.

Wednesday 30 May 2012

Appliance Cabinet Complete

Richard has finished the appliance cabinet in the galley.  Initially 600mm was allowed for the width, however he has been able to “recover” almost 50mm by making the cabinet only just wide enough to fit the appliances.  I was somewhat surprised to find the oven is wider than the fridge!

You might be able to see the end of the thin timber bead across the base of the lower opening in the cabinet.  Its purpose is to trip up the fridge should it decide to go walkabout! The next level will hold the wall oven.  The void above the wall oven is for baking trays, etc.  The top void will hold the microwave oven.  I gave the cabinet a final sanding and one coat of varnish after everyone had gone home.

Andy managed to find some time to work on the gas and plumbing.  We now have the “T” connection and isolation valves for the oven and hotplate.

The two ¾” plastic pipes below the gas fittings are for the central heating.  The rear bulkhead is now starting to look rather busy.

We have hot and cold pipes on both sides of Waiouru.  There are also central heating supply and return pipes down both sides.

Tomorrow we make a start on the pantry.  It will be opposite the appliance cabinet and only 300mm wide.  The lower half (below the gunwale) will be “pull-out” whilst the area above will have adjustable shelving.  We’ve decided to do it this way to maximise the available space.

Tuesday 29 May 2012

Galley Appliance Cabinet

The Spinflo gas oven arrived today, just as Andy had predicted!  I immediately asked Richard if he would cease work on the bed locker and start on the galley appliance cabinet as the galley is on the project critical path.

The first task was to unpack the oven so it could be checked and measured.  Jan had selected this particular model of Spinflo oven because she wanted the sliding door.

The oven is wider than anticipated

When opened the door will extend into the galley passageway.

But it then slides back underneath thereby eliminating the potential obstacle.

The port (left) rear cabin bulkhead partition has been removed to provide more room for the scribing and installation of the appliance cabinet.

View from the back cabin towards the galley

We struck two problems.  Both of which have been overcome!  The first is there was insufficient depth in the cabinet for the fridge.  This is because the large sanitation pipe (lower arrow) is routed behind the fridge at floor level.  We needed an additional 20mm and eventually found it by removing the pipe saddles that were securing the sanitation pipe to the wall.  These saddles were holding the pipe 20mm away from the side of the hull lining.  We’ll replace them with conventional saddles so the pipe is flush against the wall.

The second problem was a very slight lack of depth for one small part of the oven.  To get around this we are going to cut a hole in the wall lining and create a lined rebated compartment.  This won’t be very large as it’s only for the oven cold air inlet duct.  There will be plenty of room above the oven for the microwave cabinet so I’ve asked Richard to construct a shelf between the top of the oven and the microwave.  Jan will be able to use it for oven trays, etc.  It also means that should a higher oven need to be fitted at a later date there will be sufficient room.

We will probably have all the galley bench cabinets, the pantry and the appliance cabinet completed by the end of the week.  Hopefully we can get the granite bench top people in early next week to do some measuring.

There were two other deliveries today.  The Beta 43 engine arrived on a pallet and later in the day a courier van delivered the 900mm pivot shower door ordered from PlumbWorld.  They were the cheapest supplier I could find and I was somewhat nervous about the delivery having read some of the customer reviews.  But the order had already been placed!  Anyway, it arrived quite promptly.

Meanwhile Jan’s male friend turned up for yet another free meal.  He’s now starting to look rather large and I’m wondering if he is “weight challenged”!  I must try to find the time to watch his next take-off or landing.

Monday 28 May 2012

Varnishing

No photos today because I was too busy varnishing all the recent joinery.  It was reasonably cool inside Waiouru, which I hope is a sign of the effectiveness of the insulation.  Both side hatches were opened and I also removed the temporary covers off the houdini hatches to improve the air circulation.

The plan for the day was to lightly sand all the bare joinery with 180 grit paper and then wipe all the surfaces down with a special cloth that traps all the dust in its weave.  The surfaces were then given one coat of satin varnish which had been diluted with 10% white spirits.  The job took most of the day and despite the air circulation in Waiouru I perspired quite heavily. 

All this fluid loss will have to be replaced with amber nectar from the cafe later this evening! Smile

Todays actions should allow the joiners to keep going with the fitting of the galley and bathroom.  We have run out of accommodation options and must move on board Waiouru at the end of June.  This means the galley and bathroom must be useable.  The granite worktops in the galley will take two weeks to manufacturer from measurement to installation.  So Richard & James must install the galley units must before the end of the second week in June.  Before they can start on the galley they require the gas oven.  Therefore the delivery of the gas oven is currently the most critical item!  Andy informed me on Friday the oven will arrive tomorrow (Monday).  I just hope he is right.  He also told me the glass swing door for the shower will be delivered. 

We have accepted Waiouru will not be completed by the end of June and consequentially will be living in a half completed boat surrounded by joiners and engineers (along with all their mess!)  Not the best situation, but we have no other option.

Oh!  I have already checked the length of the marina pump-out hose and it’s just long enough to reach Waiouru.  However we will have to collect the galley, and bathroom waste water in containers for disposal.

Sunday 27 May 2012

Why no hole?

There is a second Wilson-Tyler boat beside Waiouru and I happened to notice neither of them have a hole in the top of the rudder.

Yet all the other boats in the yard or moored against the wharf do have a hole.

My assumption is the hole is there so a rope can be attached to the rudder.  Probably to ensure it’s not accidentally lost when completing maintenance on the rudder whilst the boat is in the water???

Now for the top of the boat.  A couple of photos of the mushroom vent hole which has been sanded back after the second application of filler.  This is the vent that is located directly above the partition between the bedroom and bathroom.  Immediately in front of it is the solar panel terminal with the two 6mm cables I installed earlier in the week.

  Did you see the “oops” jigsaw cut?

A fault we would probably never have known about as it would have been covered by both the paint and the mushroom vent.

I must have glued dozens of oak plugs yesterday and am quite pleased I’ve decided not to be the volunteer to cut off the excess.

The plugs in the above photo will actually be covered by the slate cladding around the diesel fire.  But the screws get covered anyway!

The “his & Her” drawer opening under the front of the bed.  Meanwhile, Richard and James have made a start on the bed footlocker.  The first cut of the side panels has been completed and they have gone back to the workshop for the cutting of the second cut scribing and fitting of the corner quarter round moulding.  All that is left to see are the chocks and markings on the floor.

The locker will also be divided into “His & Hers” and will have a lid with two gas struts to support it.

Tomorrow’s plan is for Jan and me to lightly sand the bare timber before rubbing it down to remove and dust followed by one coat of varnish.  The idea is to provide some protection to the timber whilst work continues.

Saturday 26 May 2012

Contact with home

We’ve been using Skype to maintain voice contact back “down-under”.  Sons, friends and FMIL (Favourite Mother-in-Law) are all computer literate which means the only cost is the price of the internet access.  However I have noted the quality of these “free” calls can start to deteriorate as the call progresses.

Mother in Perth won’t have anything to do with computers.  Moreover, she struggles with mobile phones, answer phones and set top box remote controls.  Calls to her are made using Skype’s pre-paid service.  One thing I have noted over the last 12 months is the pre-paid money now doesn’t last as long, yet my calls are of the same duration.  I have therefore started looking at alternatives to Skype.  After looking at Call61 I decided against it.  The call has to be placed from a landline or mobile phone, but we only have the computer.  Now I’m considering switching to oovoo or perhaps running oovoo for the pre-paid internet calls.

Meanwhile, back at the boat Richard and James spent much of the day routering ¾” plywood battens for the bed extension.  I did the sanding and then applied two coats of waterproof sealer.  The latter provides a ‘waxy’ finish which we hope will make the comb slide easily.  The sealer will also assist in preventing the plywood absorbing moisture and expanding.

One other task for the day was to run the cables for the bow cameras.  I’d previously installed some 20mm flexible conduit through the cratch to the bow thruster locker.  However I discovered that whilst the conduit had sufficient clearance for the two cables it didn’t provide enough clearance for the plugs on the end.  My solution was to split the length of conduit by cutting it with my ‘Leatherman’ serrated knife blade.  The cables were then inserted through the split in the conduit.

Richard asked if I would plug all the screw holes in Waiouru using a bag of oak plugs.  The instructions were to dip the end of the plug into some pva glue and then carefully insert the plug into the hole with the grain in the plug matching the grain in the panel.  The plug was to them be hammered into the hole until it was firmly in place.  Easier said than done for someone with poor vision.  He even wanted the screw holes inside the wardrobes and drawers plugged.  I declined the suggestion that I should cut off the protruding ends of the plugs with a chisel as I could see myself making a serious mess of the timber.

Friday 25 May 2012

Battened & Topped!

Richard expressed surprise at just how much 1”x1” pine was used to batten out the base of the main section of the double bed.
The two square compartments to the left are the for the drawers that open into the passage.  The long section with the white pipe will have the shower pump at the far end and the remainder will be long term storage.  The plan is to also have a 28mm copper pipe run in a “T” across the top of the bed and between the drawer compartments.  This will provide warmth for the clothing in the drawers and some heat up the lining of the boat.  It may even heat the mattress during winter!
The top to the base has been cut and fitted.  Richard and James have now started on the construction of the ‘comb’ which will extend the bed across the passage. 
Meanwhile, I fitted some timber panelling in the engine compartment.  The idea was to install it horizontally across the bulkhead between the engine compartment and the back cabin.  It will be used to secure pipes and wiring.  I couldn’t find a sheet sufficiently long to fit the 1800x400 area so I made it from two 900x400 sections.  The cutting of the panels wasn’t the difficult part of the task.  It was the drilling and tapping (threading) of the steel bulkhead for the machine screws!
My idea is should there be unused sections of the board after the engine bay has been completed I might be able to use it as a ‘shadow board’ for some hand tools.
After lunch Darren gave me two small packages which had just been delivered to the chandlery by the courier.  They contained the deck fittings for the pumpout and rinse points. 
So I drilled and cut the threads for both fittings where I’d previously cut the holes on the roof.  However I didn’t seal them with mastic as Darren wants to remove the fittings when he paints Waiouru.
The latest news is the engine (Beta 43) is scheduled to be delivered on Monday.

Wednesday 23 May 2012

Back to Bed

Another day mostly spent working with Richard on the construction of our cross-over double bed.  The sides have now been battened out and the base cut from a sheet of ¾” plywood.  Richard and I then scribed the front of the bed from a length of ply.  This was then levelled and the edges routered so they will join to the quarter moulding.

The entire front edge will be made from the one piece of plywood.  Richard is doing this to ensure the grain on the face of the drawers that will go under the bed actually match the grain of the timber across the face of the bed.  It’s little details like this that remind me he is a craftsman rather than a tradesman.

Whilst he went back to the workshop to cut out the drawer openings and trim the holes in solid oak I carried on with another task given to me by Andy.

He wanted me to cut the hole in the ceiling and roof for the Lockgate Refleks stove.  The first thing to do was move the stove to the boat and position it centrally on the hearth.  Andy then marked the centre of the hole on the ceiling.  The hole inside the boat was to be 6” diameter and the hole through the steel roof to be 4”.  The reason for the larger hole in the ceiling is to ensure there is no combustable material (eg, timber) near the stainless steel flue. 

My planned technique was to drill a small pilot hole from inside the boat and then use a circular 4” hole saw to cut a hole through the roof from the outside.  This would enable me to check if there were any electrical wires between the spray foam and the ceiling lining.  Unfortunately none of the 4” saw blades was sufficiently sharp to cut a hole.  It would need to be cut with a jigsaw and steel blade.  Consequentially I had to cut the 6” inside hole first.  “Murphy’s Law”….. There was a wire behind the ceiling lining and I shredded it with the saw!!!  After cleaning the 6” diameter hole of spray foam I drilled a larger hole in the roof and used a jigsaw to cut out the circular hole.

Can you see the shredded cable in the photo?  I now have to somehow replace it! <grrrr>

Andy doesn’t want any self-tapping screws in the shell as he believes they work loose.  The top of the flue is secured to the roof with five 8mm stainless steel machine screws.

My technique was to position the flue and mark the first hole.  This was then drilled with three HSS bits to create a 7mm hole.  I then threaded the hole with an 8mm Tap. Each hole was individually drilled and tapped in sequence to ensure I had all the holes in the right location.

Finally, I applied a layer of “Sticks like Sh*t” adhesive to the underside of the flue and screwed it securely to the roof.  All the surplus adhesive was then removed with white spirits.

Meanwhile Andy had run the last of the gas line into the gas locker via the fitting I had drilled and fitted the previous week.

Back to bed making…….  I suppose you will want a photo of my hospital corners Winking smile

More work on the bed

The bed was re-plumbed this morning as Richard had worried about it overnight.  All the moving, shuffling, banging and re-levelling resulted in one side being adjusted by ONE MILLIMETRE.  This joiner is a perfectionist!

After all that adjusting the sides of the bed were then removed to have the quarter moulding added, along with the solid oak top trim.  After everything was cut, routered, glued, screwed, filled and sanded the two side were fixed back in the bedroom and secured with temporary chocks.

One side back in with the quarter moulding and trim

Later this afternoon we started cutting and fitting the softwood battens that will secure the bed frame from the inside.  As the floor rises all the measurements from now on will be taken from the top of the bed where both sides are level.

Whilst Richard was trimming the sides of the bed I got all excited at the back of the boat with the electric hole saw. 

Some fellow boaters might recognise the exterior shore-power socket.  For any non-boating readers, a shore-power socket is a male 240v fitting which enable electricity from the shore to be supplied to the boat.

But this isn’t a shore-power socket.  It’s one of these…….

A Whale Swim ‘N’ Rinse Shower fitting.  This will be connected to the calorifier and supply hot water at the back deck.  We thought it might be good for washing boots, a dirty dog or filling a bucket with hot water.

The 6mm solar cable I ordered on the Internet Sunday evening arrived today.  Very prompt service!  After some searching on Google we placed the order with The Electric Cable Co.  I purchased 36 metres of 6mm cable.  Why 6mm? The planned location for the panels is towards the bow and I wanted to minimise the voltage drop between the panels and the batteries which are at the very rear stern of the boat.  So running the cable is yet another task awaiting attention.

However, tomorrow it will be back to bed! Smile

Tuesday 22 May 2012

More Equipment Arrived

Much of the day was spent working on the wardrobes in the main bedroom.  Richard again checked and re-plumbed the wardrobe walls before cutting, scribing and re-cutting some 7mm oak plywood which he then fixed into the base of each wardrobe.  He wanted to make sure if anyone looked at the floor in the wardrobe they would see oak rather than the marine plywood flooring. 

Together we then cut and fixed 20x20mm pine battens around the inside of each wardrobe.  This “fixed” the panels from the inside.

Once the installation of battens was complete the pine “chocks” holding the panels in place from the exterior were removed and set to one side.  We will be reusing them for fitting of the bed.

Actually the bed is also proving to be interesting as the floor is still rising towards the bow.  There’s approximately 10mm difference in floor height between the two sides of the cross-over bed.  Richard is employing the same technique as used for the wardrobes.

The sides of the bed have been roughly cut to size and then plumbed in using the softwood chocks from the wardrobe.

There is a 12”  wide “passage” either side of the bed which terminates at a bedside lowboy (top arrow).

Richard, Jan and I discussed the height of the bed.  The higher the bed is above the floor; the greater the length.  This is due to the “flaring” of the steel hull (the beam increases between the baseplate and the gunwale.  However, if we have the bed too high above the floor we will find there is a lack of headroom under the gunwale.

Eventually we decided the base of the bed will be 14” above the floor.  The mattress will add a further 8”, which will leave us with 16” of headroom.  The top of the lowboys will be 2” higher than the mattress.  By specifying the lowboys to be higher than the top mattress we hope we won’t accidentally knock anything off them whilst sleeping.

Andy informed me the morse controller, shore-power fitting and external “shower-power” fitting had arrived and I was welcome to start cutting more holes in Waiouru.

During the lunch break I took the components to Waiouru and marked out where they will go.  The morse controller gave me the greatest difficulty.  It needed to be positioned so its movement wouldn’t be “fouled” when selecting reverse.  Moreover, I wanted to ensure it was the right height.  It will be positioned on the left side of the cockpit and my thought was the top of the controller handle should be within normal reach of my left hand when standing.

The red arrow points to the proposed location of the hole for the controller.  As you can see I also made a start on cutting the hole for the flush mounted shore-power fitting.  The blade on the 3¾” hole saw is rather blunt and after 10 minutes I only appear to have polished the steel!  The cutting technique may have to be reconsidered.  At least there is currently plenty to keep me busy.

Sunday 20 May 2012

Walk–Sunday 20 May

This time the walking circuit was to the south-west near Brimpton.  The route was slightly over 18km, so rather shorter than normal as I wanted to get back and complete a couple of tasks on Waiouru before everyone returns to work tomorrow.

I’ve now walked so much of the local area I’m finding the first third of my walks are over ground previously covered.  Walking through the woods is always interesting.  It’s the sunlight bursting through the green canopy and the smell of damp vegetation that’s a total contrast to Australia.  I see less wildlife (mostly deer and pheasants), however they make a change from kangaroos, wombats and koalas.

These photo’s were taken using the camera in the Garmin gps.  The battery was flat on the Penta.  It was checked and (accordingly to the display) full before I departed.  However when I took it out to take the first photo the camera just shut down <grrrrrr>

In an earlier post I mentioned the large number of horses in the area.  Well it must rain quite heavily to the west of Tadley because the horses in this area have all shrunk.

The foal was smaller than a Labrador!  But rather cute!

This area of Brimpton Common was a sea of dandelions and buttercups.

After passing across the common I reached an area signposted as a preserved water pasture.  I hadn’t anticipated having to cross sodden, swampy fields.  Don’t see much of them in Oz!  However I paused, remembered my NZ swampy field crossing technique, and managed to get to the far side without filling my boots.  It was then a matter of walking up the final ridge and through the Brimpton Church cemetery.  Does this mean I’ve walked through the dead centre of Brimpton?

By now the weather was starting to get overcast, cold and windy.  A burst of speed was required to get me back to my start point reasonably quickly.

After a hurried late lunch I donned my playsuit (overalls) and scurried across to Waiouru.  The first task was to finish the repainting of the engine compartment.  The engineers have left a mess which offends my sense of tidiness.

.

90% complete

Done!

The engine is due to arrive this week and I’d rather like the compartment to be in good condition before it is fitted.

The second task was to apply another coat of body filler (“bog”) to the mushroom vent hole in the roof.  As I mentioned in an earlier post, the last builder cut it in the wrong place and had it positioned immediately above the bathroom-bedroom wall.   I’d previously applied a first coat of filler which had hardened . It now needed to be sanded back before a second coat was applied.

Filled hole to the left and solar panel terminal box to the right.

My intention is to sand the second application back to a “dome” shape to further improve its resistance to water.  Eventually a false mushroom vent will be fixed over the top.

The next task was to get some primer paint and touch up the bare metal from the sander and the weld hot spots on the exterior of the shell.

The last task was to take a photo and measure the hot plate ring on the Lockgate Reflex diesel stove.  Jan wants the diameter as she intends to purchase a kettle to fit on the stove.

Back to “real work” tomorrow! Smile

Clear as Day


According to the writer of one letter to the editor of an Australian newspaper it’s all so logical.

When I was a kid we never had drought.
Then we started with daylight saving.  We started with a little bit, but now we have six months of the year daylight saving.

It has just become too much for the environment to cope with.

It is all so logical, for six months of the year we have an extra hour each day of that hot afternoon sun.
I read somewhere that scientific studies had shown there is a lot less moisture in the atmosphere which means we get less rain.

I believe this one hour extra sun is slowly evaporating all the moisture out of everything.
Why can't the Government get the CSIRO to do studies on this, or better still, get rid of daylight saving.
They have to do something before it is too late.

CHRIS HILL
Albury

Meanwhile; as you can see from the following photo; I’ve been down in the bow water tank applying the second coat of black paint.  More fumes inhaled…………

Now all I have to do is clean the paint off my hands and head! Winking smile

Saturday 19 May 2012

Galley Arrived

Richard finished the wardrobe front panels today and the last job we did together was to glue and screw them to the side panels.  His next task is to make and hang the doors.

The corner quarter mouldings are very pleasing on the eye and create a wide funnel effect when looking towards the exterior door (which  I made…. as you can tell from the quality!)  The grain on the side panels are similar and the same has been done with the front panels
Richard carefully routed a small bevel on all the edges where the moulding joins the panels.  This gives it a very nice finish.  These little “extra” touches make all the difference between a good and outstanding finish!

He has also trimmed the door surrounds with 15mm of solid oak.  I’ve attempted to adjust the colour in the following photo to highlight the trim (lower red arrows).

The doors will now be cut to size and the edges also trimmed with 15mm oak before being hung.
There was another delivery today.  This time it was the galley carcasses and cupboard doors.  The carcasses are made from light oak veneer whilst the doors & drawer faces are of solid oak.

.
I unpacked and assembled the drawers which have a ‘soft close’ mechanism.  The carcasses are only roughly in place.  We now require the wall oven so the location and size of the port side end cabinet can be finalised.  It will contain the fridge, wall oven and microwave.  Richard will also make the pantry cabinet on the opposite side of the galley.  Jan has decided to have low drawers where the cabinet ‘kick-boards’ are usually located and Richard has already sourced a supplier.
Two things you may have noticed in the photo above.  The first is the hull line below the gunwale isn’t perpendicular.  You might also have seen in the right side of the photo part of the boat layout plans I drafted.  I keep referring to them when running cables or pipes.
Tomorrow is “Paint the water tank day!”